Uploading a document
The Origin app allows its clients to create an organizational hierarchy using its Facilities section. You can add details about your building/organization/facility, edit and update general information, and upload various documents as required.
How to upload a document
To upload a document to a building, follow these steps:
-
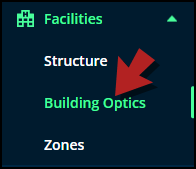
Click on the Facilities drop-down from the left navigation panel and select Building Optics.
-
You'll see a list of facility names with a + icon next to each name.
-
Click on the + icon to reveal the buildings of a facility.
-
Click on the building name to upload a document to it.
-
You'll be directed to the building optics page of the selected building.
-
Scroll down on this page and you'll see different tabs.
-
Switch to the Documents tab.
-
Click on the + Upload Document button.
-
A modal will open.

-
Click on Type of document drop-down and select what kind of document you are uploading.
-
Set a date in the Expiration date field for when the document expires. For example, if it’s a license.
-
Click on the Send me reminder drop-down to set a time to get a reminder about the document expiry.
-
Add a description of the document in the Description box.
-
You can either drag and drop a file or click to browse and upload the document from your desktop.
-
Click Update to upload the file or hit Cancel to go back.
