Back to Brightly Data Share Main Menu
In this article, you will find self-service instructions for the following BI connections:
-
Self-Service Connect Power BI to Snowflake
-
Self-Service Connect Tableau to Snowflake
-
Self-Service Connect Sigma to Snowflake
-
Self-Service Connect to Snowflake from DBeaver
-
Self-Service Connect to Looker
-
Self-Service Connect to Excel (w/ODBC driver)
Self-Service Connect Power BI to Snowflake
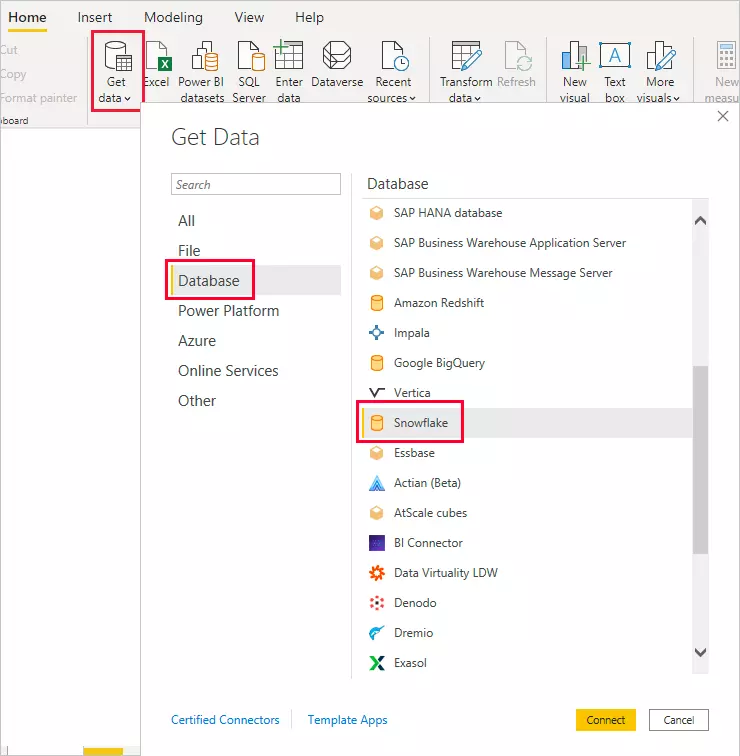
1. Choose the Snowflake Connector
Open the Power BI application, click Get Data from the Home ribbon menu. In the Database category on the left sidebar, click Snowflake. Next, click Connect.
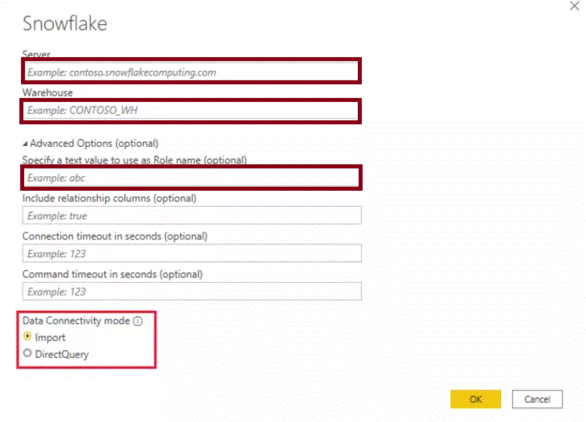
2. Configure Snowflake connection
On the Snowflake window, enter the server address (i.e., the URL that you use to access Snowflake reader account) you want to connect to and the compute warehouse that you’ll use for queries. These details will be shared by the Data Cloud.
After filling out the Server, Warehouse, and Role in Advanced Options; you’ll notice two options for querying your data underneath “Data Connectivity mode.” You can choose to DirectQuery or Import data directly into Power BI.
3. Enter your Snowflake credentials.
Next, enter your username and password and click Connect.

4. Select which tables you want to analyze.
Once you’re connected, you can select one or more tables to import (if you choose to import data option) from the Navigator window.
Here are the differences between selecting Load and Transform Data:
-
Load: The entire table selected is brought into Power BI as-is.
-
Transform Data: You can filter and refine the data in the table by using the Power Query Editor before loading the refined set of data into Power BI.
Self-Service Connect Tableau to Snowflake
1. Start Tableau
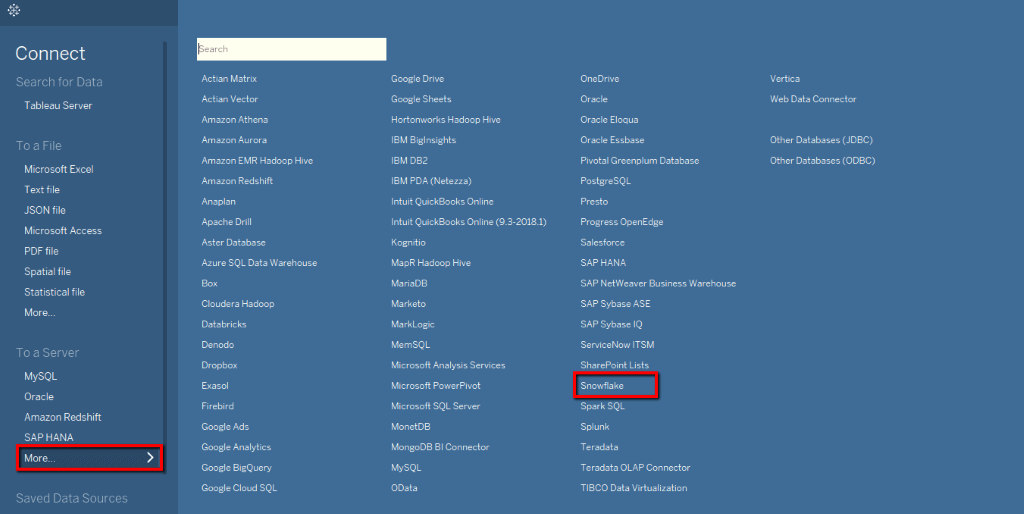
2. Connect to Snowflake - With the help of Tableau’s connection manager, connect to Snowflake by choosing the option as “Snowflake”.
3. Select the authentication type and provide the following credentials.
4. Enter the name of the server that you want to connect to. The server name is provided by Brightly Data Cloud administrator.
5. Enter the name of the role that you want to use. The role name is provided by Brightly Data Cloud administrator.
6. Select the Authentication method as Username and Password.
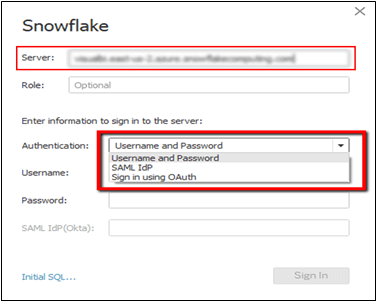
7. Enter the Username and Password. The login credentials information is provided by Brightly Data Cloud administrator.
8. Select Sign In.
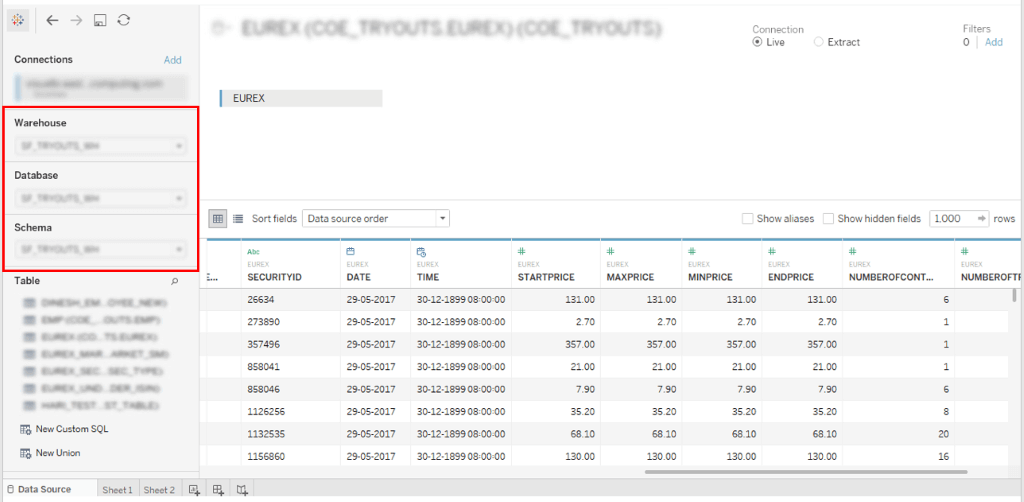
9. Once you successfully connect to the Snowflake server, select the appropriate warehouse, database and schema details. Again, the warehouse, database and schema information is provided by Brightly Data Cloud administrator.
10. If Tableau can't make the connection, verify that your credentials are correct. If you still can't connect, your computer is having trouble locating the server. Contact your Brightly Data Cloud administrator for assistance.
Self-Service Connect Sigma to Snowflake
Connect to Snowflake from Sigma
1. Open your Admin Portal by selecting Administration in the user menu at the top right of your screen.
2. Select the Connections page from the left hand panel.
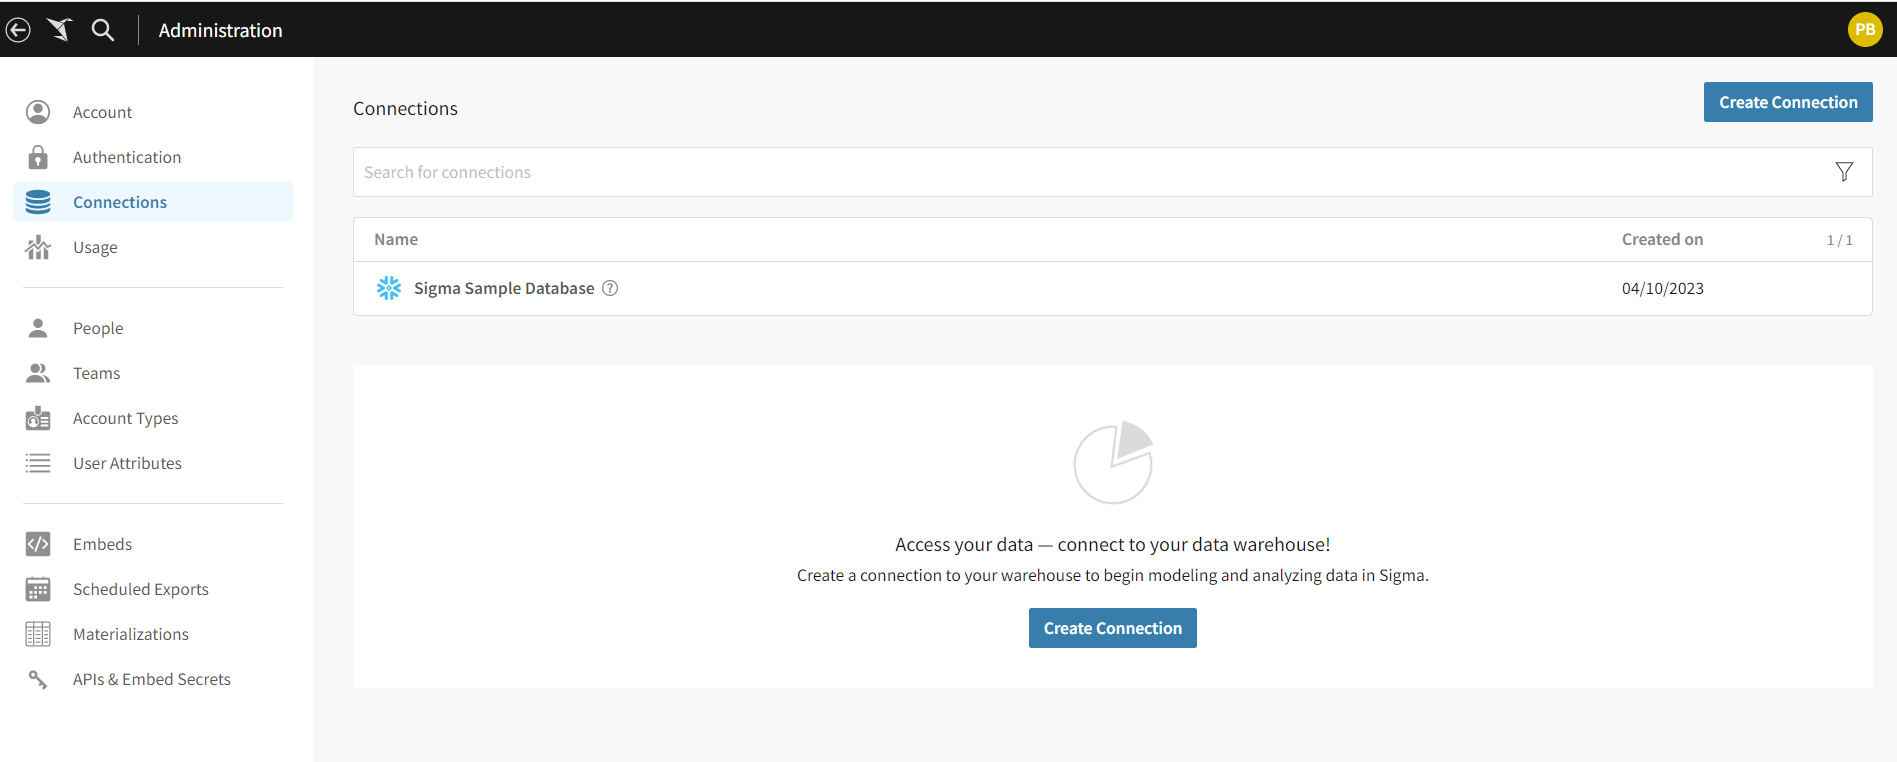
3. Click the Create Connection button.
4. Name your connection ex: Brightly-Reader-Account.
5. Select Snowflake under warehouse type. You will then be prompted to specify your Connection Credentials.

6. The highlighted information is provided by Brightly Data Cloud administrator. You can replace the sample values used in the above screenshot with the information shared by Brightly Data Cloud administrator.
7. Under Account, enter the account name of your Snowflake instance.
8. Under Warehouse, enter your warehouse’s name as listed in Snowflake.
9. Under User, enter your Snowflake username.
10. Under Password, enter your Snowflake password.
11. Under Role, you can specify a Snowflake role to be used on this connection.
12. After completing the form, click the Create button.
Self-Service Connect to Snowflake from DBeaver
1. Download the latest DBeaver client from DBeaver.
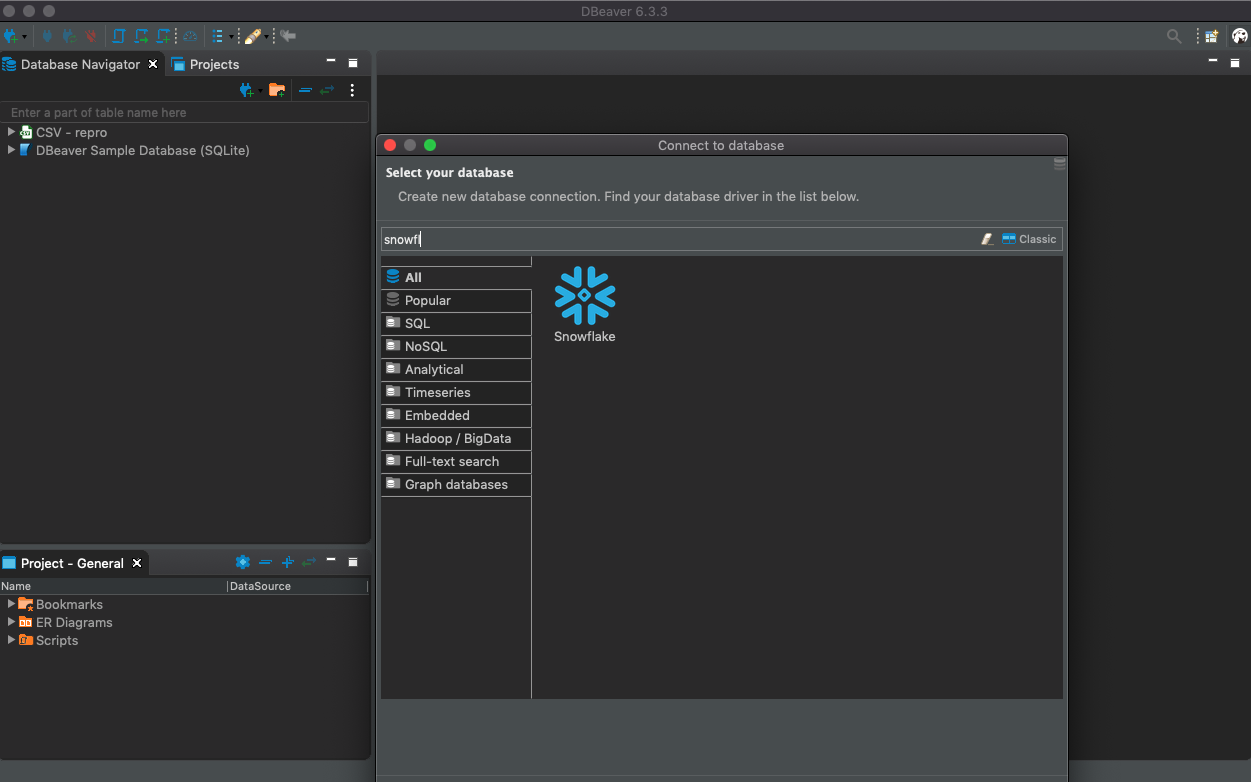
2. Open the DBeaver application. Select the top menu and under “Databases” click on “New Database Connection” . In the “Connect to database” window select “All” databases and search for “Snowflake” and click on next.
You will be prompted to download the latest JDBC driver for Snowflake. Download the driver and proceed.
3. On the “Connect to database” window go to the “General” tab and enter your Snowflake user data: Host (Snowflake account URL) Database, Warehouse, Schema, User, Password, and Role and click on Test Connection.
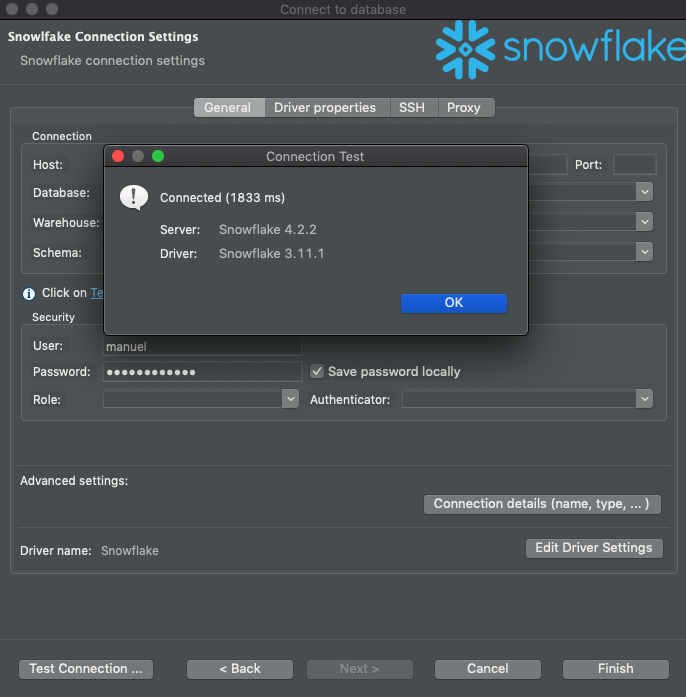
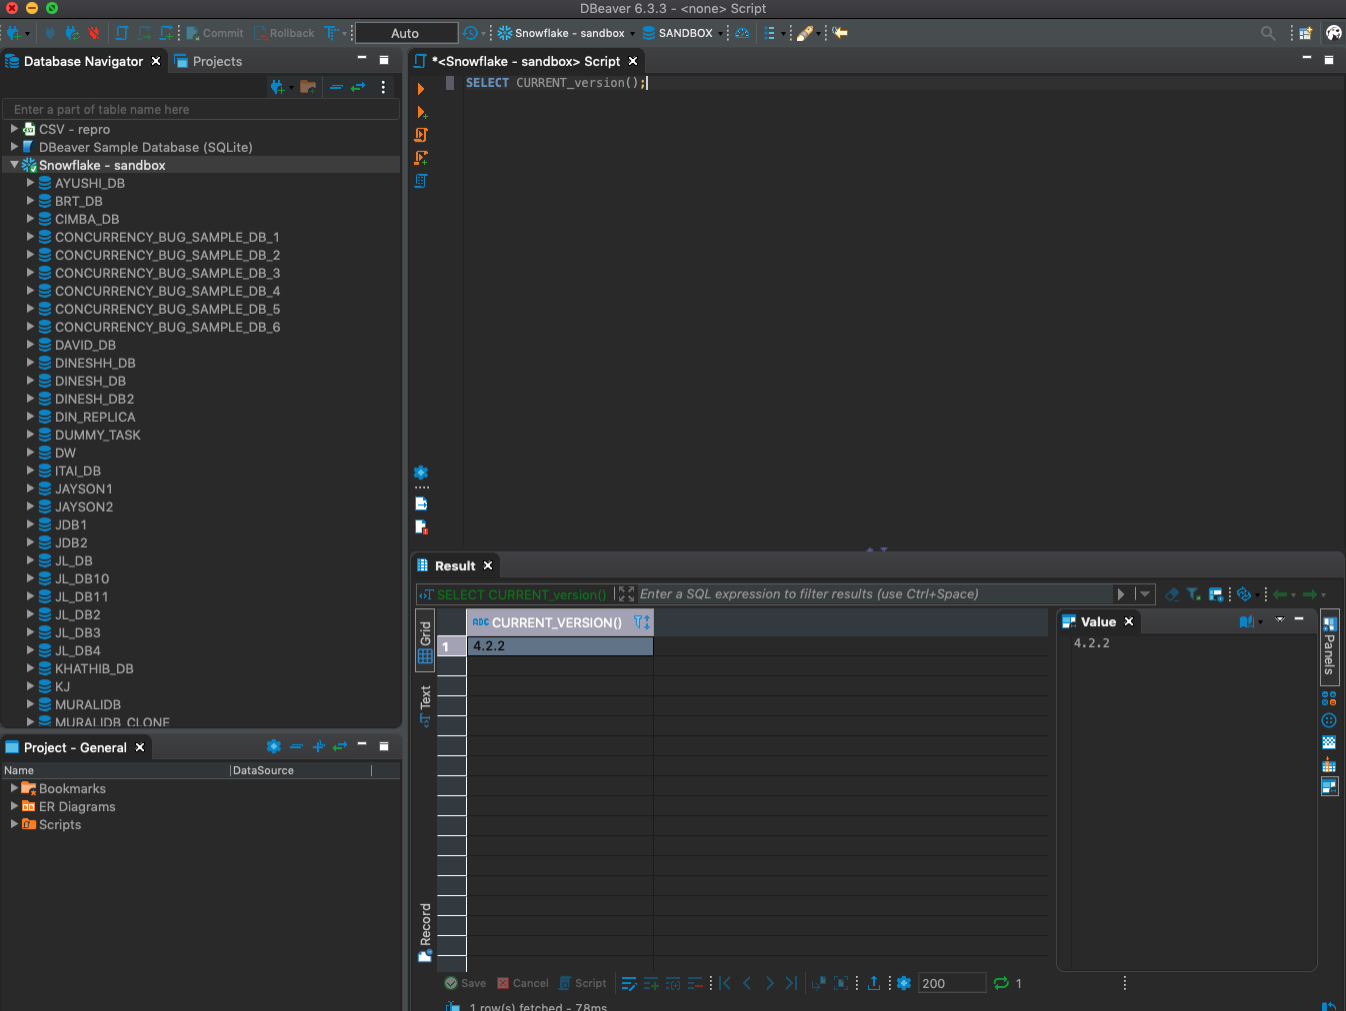
4. Once the Test Connection is successful you may click on Finish. The Snowflake database will be visible in the Database Navigator on the DBeaver UI. You may test the connection by querying the Snowflake version.
Self-Service Connect to Looker
In the Admin section of Looker, select Connections, and then click Add Connection.
Fill out the connection details. The majority of the settings are common to most database dialects. See the Connecting Looker to your database documentation page for information. Some of the settings are described next:
-
Name: Give the connection a name. This is how the LookML model will reference the connection.
-
Dialect: Select Snowflake.
-
Host: Enter the Snowflake hostname. It will look like <account_name>.snowflakecomputing.com. Check Snowflake account name examples by region to make sure you use the right value for your deployment. <account_name> will be provided by Brightly data cloud administrator
-
Port: The default is 443.
-
Database: Enter the database name provided by Brightly data cloud administrator. This field is case-sensitive.
-
Schema: Enter the schema name provided by Brightly data cloud administrator.
-
Authentication: Select Database Account:
-
Use Database Account to specify the Username and Password of the Snowflake user account that will be used to connect to Looker.
-
The user credentials will be provided by Brightly data cloud administrator
-
-
Additional JDBC parameters: Add additional JDBC parameters from the Snowflake JDBC driver.
-
Add warehouse=<YOUR WAREHOUSE NAME>.
-
<YOUR WAREHOUSE NAME> will be provided by Brightly data cloud administrator
-
-
Additionally, by default, Looker will set the following Snowflake parameters on each session:
-
TIMESTAMP_TYPE_MAPPING=TIMESTAMP_LTZ
-
JDBC_TREAT_DECIMAL_AS_INT=FALSE
-
TIMESTAMP_INPUT_FORMAT=AUTO
-
AUTOCOMMIT=TRUE
-
You can override each of these parameters by setting an alternative value in the Additional JDBC parameters field, for example: &AUTOCOMMIT=FALSE
-
To verify that the connection is successful, click Test. See the Testing database connectivity documentation page for troubleshooting information.
To save these settings, click Connect.
Self-Service Connect to Excel (w/ODBC driver)
This section will help you prepare your environments with required prerequisites that allows you to connect to Data Cloud Snowflake using your Data Reader account through Excel sheets for all reporting and analytics.
Steps to Setup and Use the Self-service Excel Reporting Engine
Before utilizing the Excel Reporting Dashboards by connecting to Snowflake Data Cloud reader accounts, you need to follow some mandatory pre-requisite steps that are explained below.
Prerequisites
NOTE The steps mentioned in this documentation are for Windows based machines only. The other operating systems are not supported currently.
ODBC configuration
Snowflake ODBC connector for Windows is required to connect Snowflake through Third Party application or system.
You can download and install the driver through this link: https://docs.snowflake.com/en/developer-guide/odbc/odbc-windows
After installing the connector, you are required to configure it through the following steps:
-
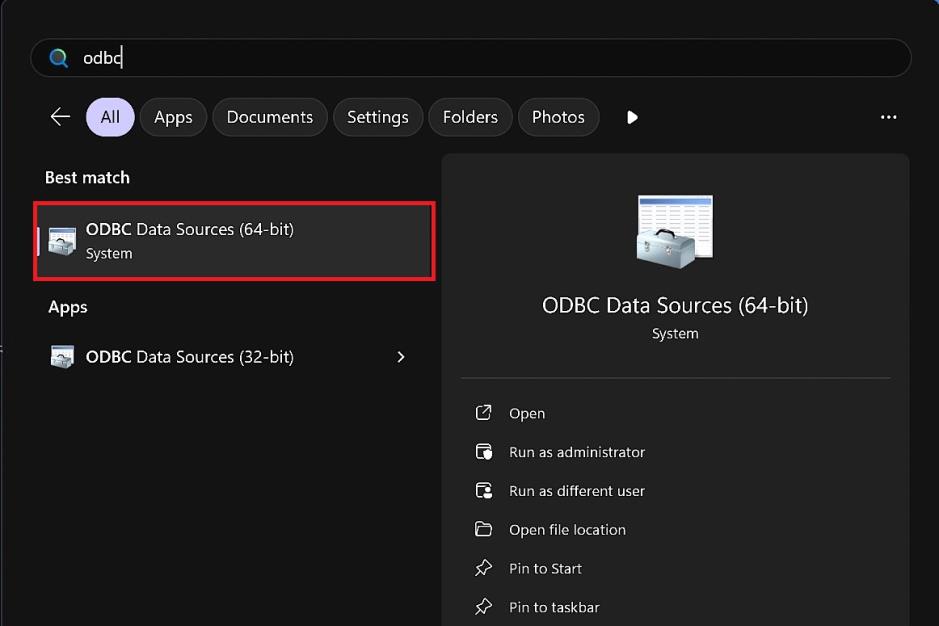
Open Start Menu and search for ODBC, and open ODBC Data Sources (64-bit).
-
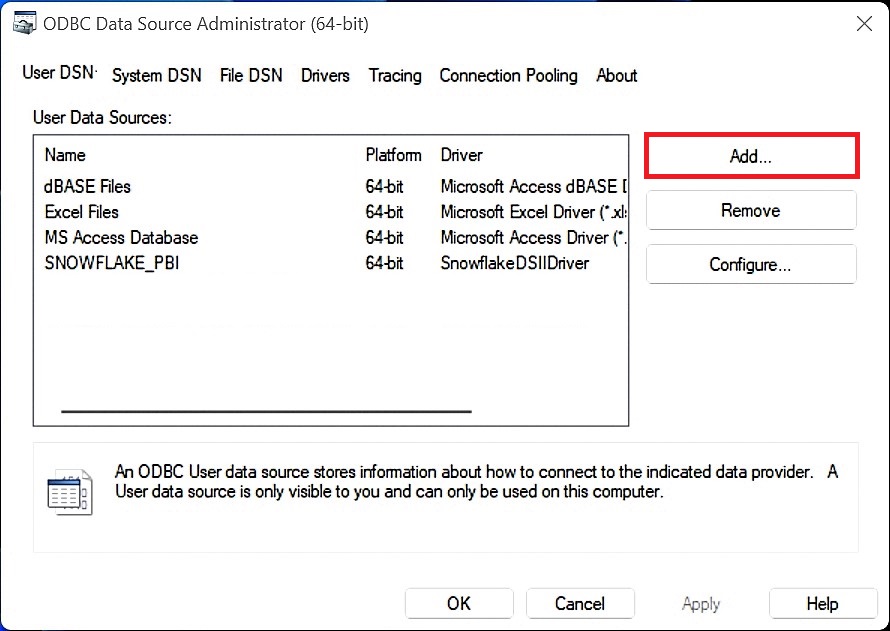
In the ODBC Data Source Administrator (64-bit) window, click Add to create a new configured connection.
-
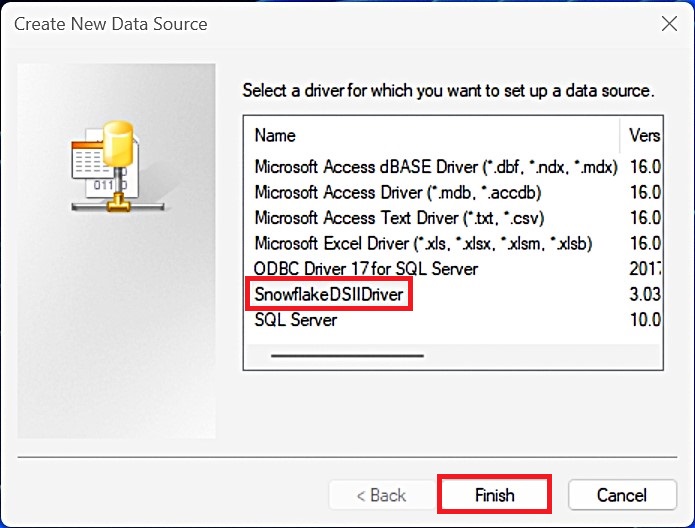
A new pop-up widow will appear, choose SnowflakeDSIIDriver and click Finish.
-
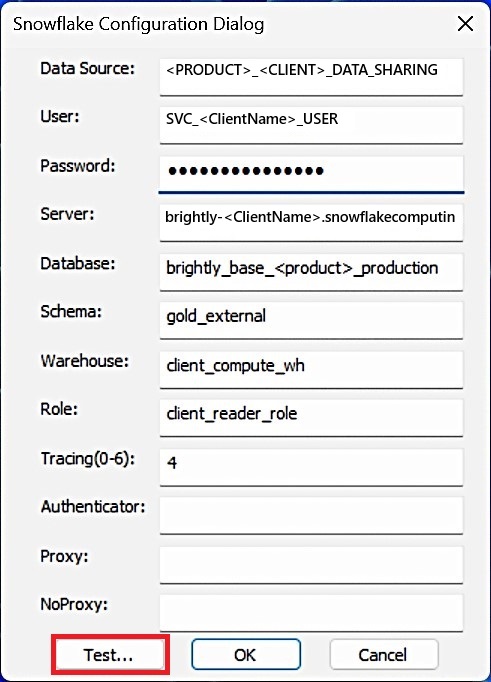
In the new pop-up window, fill the configuration details as mentioned below:
-
Data Source: Any name you prefer to use as an identifier for this connection
-
User: SVC_{ClientName}_USER
-
Password: *************
-
Server: brightly-{ClientName}.snowflakecomputing.com
-
Database: brightly_base_<product>_production
-
Schema: gold_external
-
Warehouse: client_compute_wh
-
Role: client_reader_role
-
Tracing(0-6): 4
-
NOTE Data Cloud team will provide you the details of User, Password, and Server after the creation of the reader account.
-
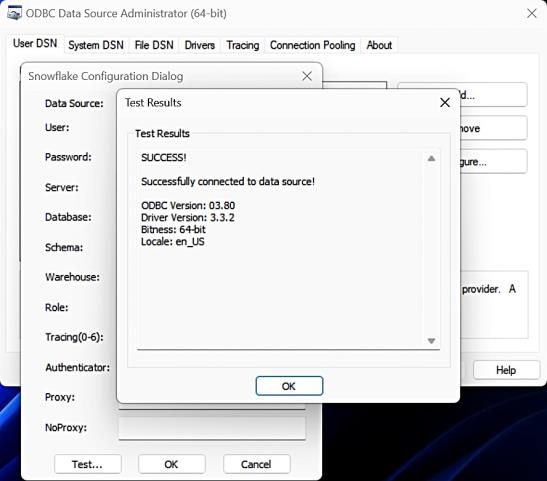
Once the configuration is completed, click the Test…button.
-
Upon successful connection set up, the following pop-up will appear on the screen.
-
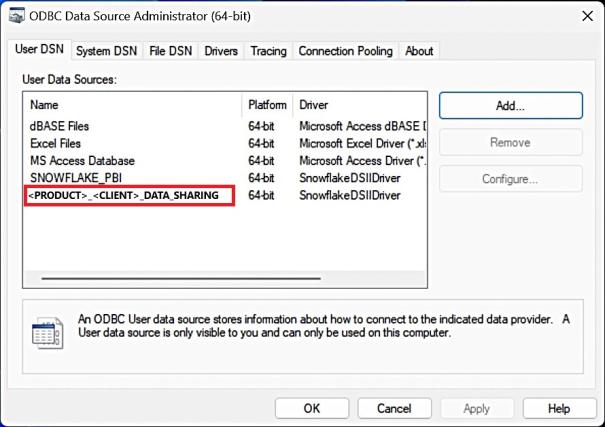
Click OK to save the configurations. The newly created ODBC connection should appear in the User Data Source list.
Excel Configuration
Once the ODBC configurations are done, you can directly open Excel reports and start reading data directly from Snowflake. You just need to configure it once when the document is opened for the first time. Here are the steps that you need to perform:
-
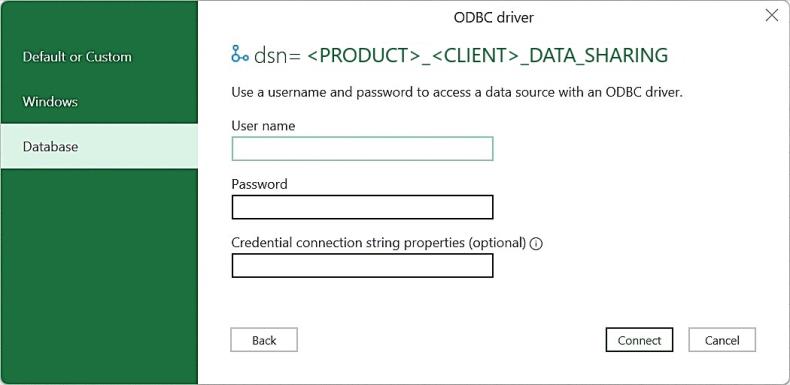
When the document is open for the first time, a pop-up window will appear on the screen to fill your Snowflake credentials and sync with the pre-configured ODBC connection setup.
-
Use the username and password provided by data cloud team (same like the ones used in the ODBC configuration).
-
Click Connect after filling all the details.
-
A security warning message will pop-up on the screen when the file is opened.

-
Click Enable Content on the warning message. This will allow the auto-refresh engine to run and update the file.
-
Once enabled, it will start fetching data automatically from source. The running status will appear at the bottom of the file.

-
After the data is updated successfully, another pop-up will appear.

-
It is an informational pop-up, stating that this document is read only and you cannot update/delete any values from the report. Click OK and ignore it.
-
You can use the report now, navigate through its sheets and export its data as needed.
