Assigning a Work Request to a Reactive Inspector
Outcomes: Gain an understanding of the Reactive Inspector functionality on the Assetic Mobile app.
Prerequisites: The Mobile User must be configured with appropriate permissions to be allocated and approve, update and reject a Work Request (Mnt Work Request Gatekeeper & Mnt Requestor)
Work Requests can be assigned to a Reactive Inspector, who can then use the Assetic Mobile app to view, update, and move a Work Request through its life cycle.
This may be particularly useful to limit generated Work Orders where capturing the exact time and cost of inspecting a job is not considered material and ensuring quick first response to scope a job is important.
Using the Reactive Inspector functionality can reduce the time taken to dispatch information to the field as it saves having to complete all required Work Order fields prior to issuing to an inspector.
To ensure a Work Request can be actioned appropriately, as the request moves through its life cycle, it transitions through various statuses. The status transition workflow is shown below.
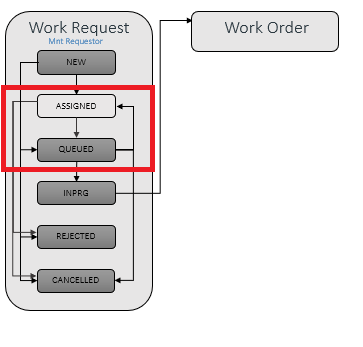
Once a Work Request has been assigned, it will appear in the Inspector's 'Assigned' Work Requests tab and will remain there whilst queued.
A Work Request with the Status of "New" or "Queued" can be Moved to the status of "Assigned". This will then become available on Mobile and allow the Work Request to be actioned from within the Assetic Mobile App.
The following steps show how a request can be assigned from Assetic Cloud, opened, actioned and moved through various work flows (status's).
Step 1: Assign to Inspector
Within the Work Request, assign the appropriate Reactive Inspector.

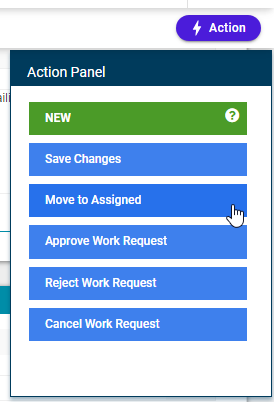
Step 2: Move to Assigned
Using the Actions button, select the 'Move to Assigned" option which will move the Work Request through the workflow and be available on the assigned user's mobile device.
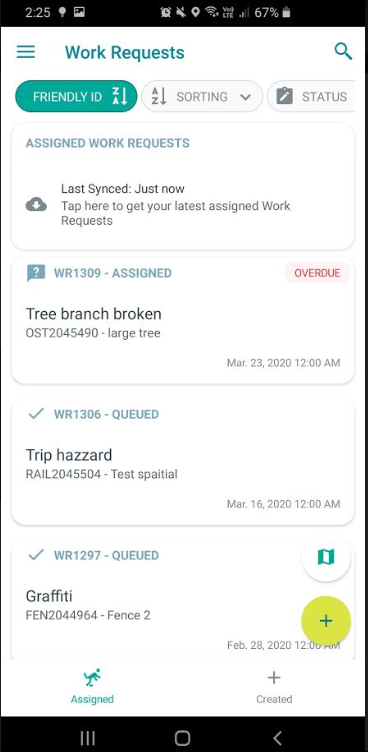
Step 3: Open Work Requests tab
All assigned Work Requests will appear in the work request "Assigned" tab as shown below.
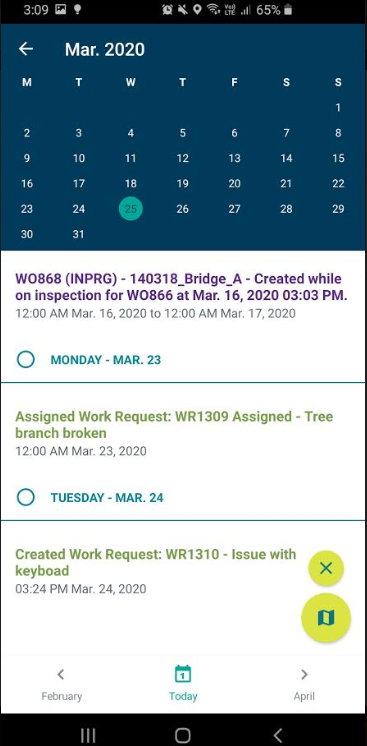
Alternatively, assigned Work Requests can be found using the "Agenda". The Work Request will appear on the "Resolution Due Day" that was populated when the Work Request was created.
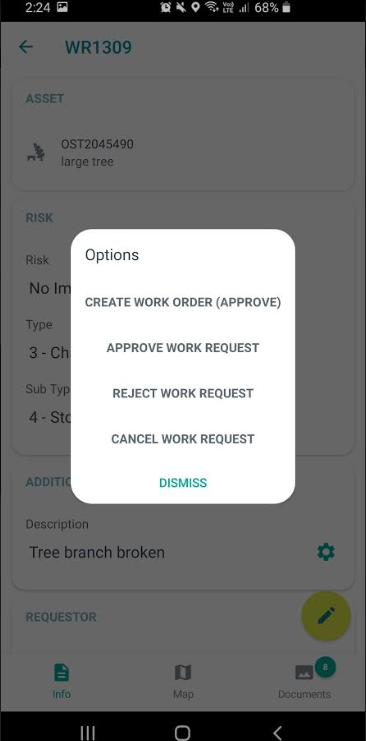
Step 4: Action Work Request
The Work Request can be opened from the above list. From here, relevant information can be added (including relevant asset details if required). Once complete, the Work Request can be moved through its life cycle. If the Work Request is then approved, the status will change to "Queued" and the relevant person(s) can action these in the Assetic cloud platform. Alternatively, if the Inspector has relevant Work Order permissions, they can create a Work Order. The available options will be dependent on both the current status of the Work Request and the user's assigned security roles.
Once the Work Request has been actioned, the "Inspection Date" field will be populated in Assetic Cloud.
