Mapping and Location
Outcomes: Learn how to add Asset's location on the map widget and update Location attributes.
Brightly Assetic includes full integration with Google Maps for visualising and locating data.
There are 3 ways in which the Map data for an Asset can be updated:
-
Enter address details (automatically Geo-coded to visualise the asset on a map)
-
Upload via Data Exchange Import Wizard
-
Transfer spatial data from a GIS (for more precision)
The inbuilt Google Maps integration is able to render Asset data:
-
At an Asset Level
-
At an Aggregate Level via Advanced Search
NOTE Assets are rendered as a polygon / XY-midpoint from its spatial data (if available), otherwise the Geo-coded point is used to locate the asset. Polygons are only displayed at closer zoom levels.
There are also additional attributes fields that can be updated within the Mapping menu.
Asset Level Map & Address Entry
On the Asset dashboard, the below Google Maps widget will be displayed.
The Map widget shows the currently entered address details and spatial location of the Asset.
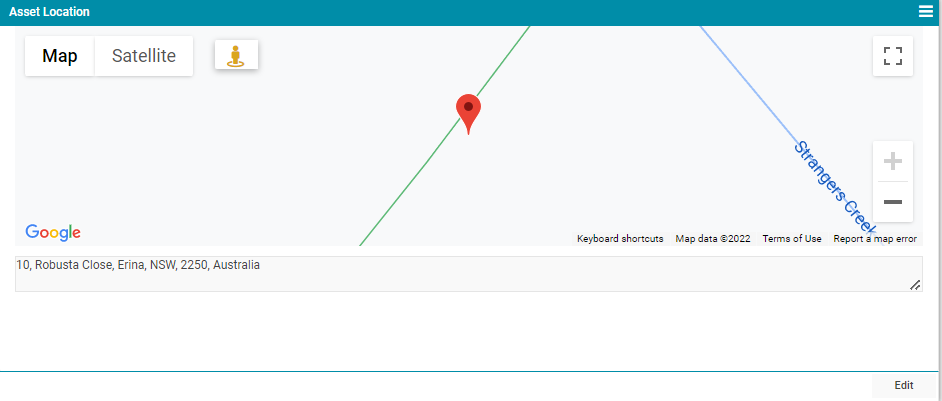
The behaviour of the map view for a single record is :
-
If the point coordinate is available, it displays that map view.
-
If the point coordinate is unavailable, but the location address is, then it displays the address location in the map view.
-
If none of the above are available, the map defaults to the Melbourne Assetic office.
In the above example, the Asset's location is denoted by the pin icon ( ) and the "10 Robusta Close" address is shown underneath the map.
The map can be toggled between Map/Satellite views by clicking on the options in the top left corner of the Map widget. Google Street View can be utilised by clicking  .
.
To change the asset's address details, click the "Edit" button.
It will then show the following dialog box:

When typing, the data input will attempt to partial-match the asset's address. This will suggest address matches to choose, from generated, from the address typed thus far and facilitates to speed up the data entry process.
Filters can also be applied to assist with address location data entry:
-
All: No filters will be applied
-
Establishments: Only match on business/establishment names and locations
-
Addresses: Only match on precise addresses (i.e. a fully specified address)
-
Geolocations: Return only geocoding results, rather than business results (generally used if the business location specified is indeterminate)
Once an address has been selected, it will be automatically Geo-coded so that the asset can be mapped.
The Street View icon ( ) can then be used to improve the accuracy of the asset's location.
Once the Street View icon has been clicked, the following will display:
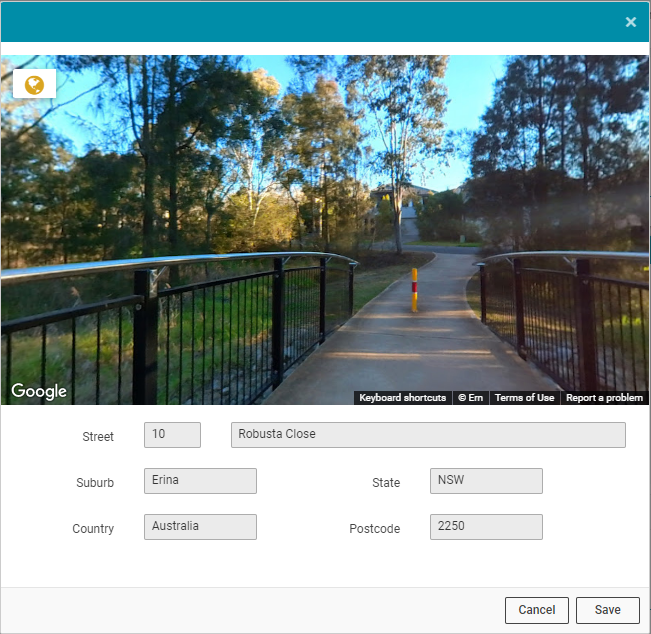
The location pin ( ) can be dragged to a new position to more accurately mark the location of the asset via the Street View interface.
Click "Save" to save both the address information and the geo-coded data.
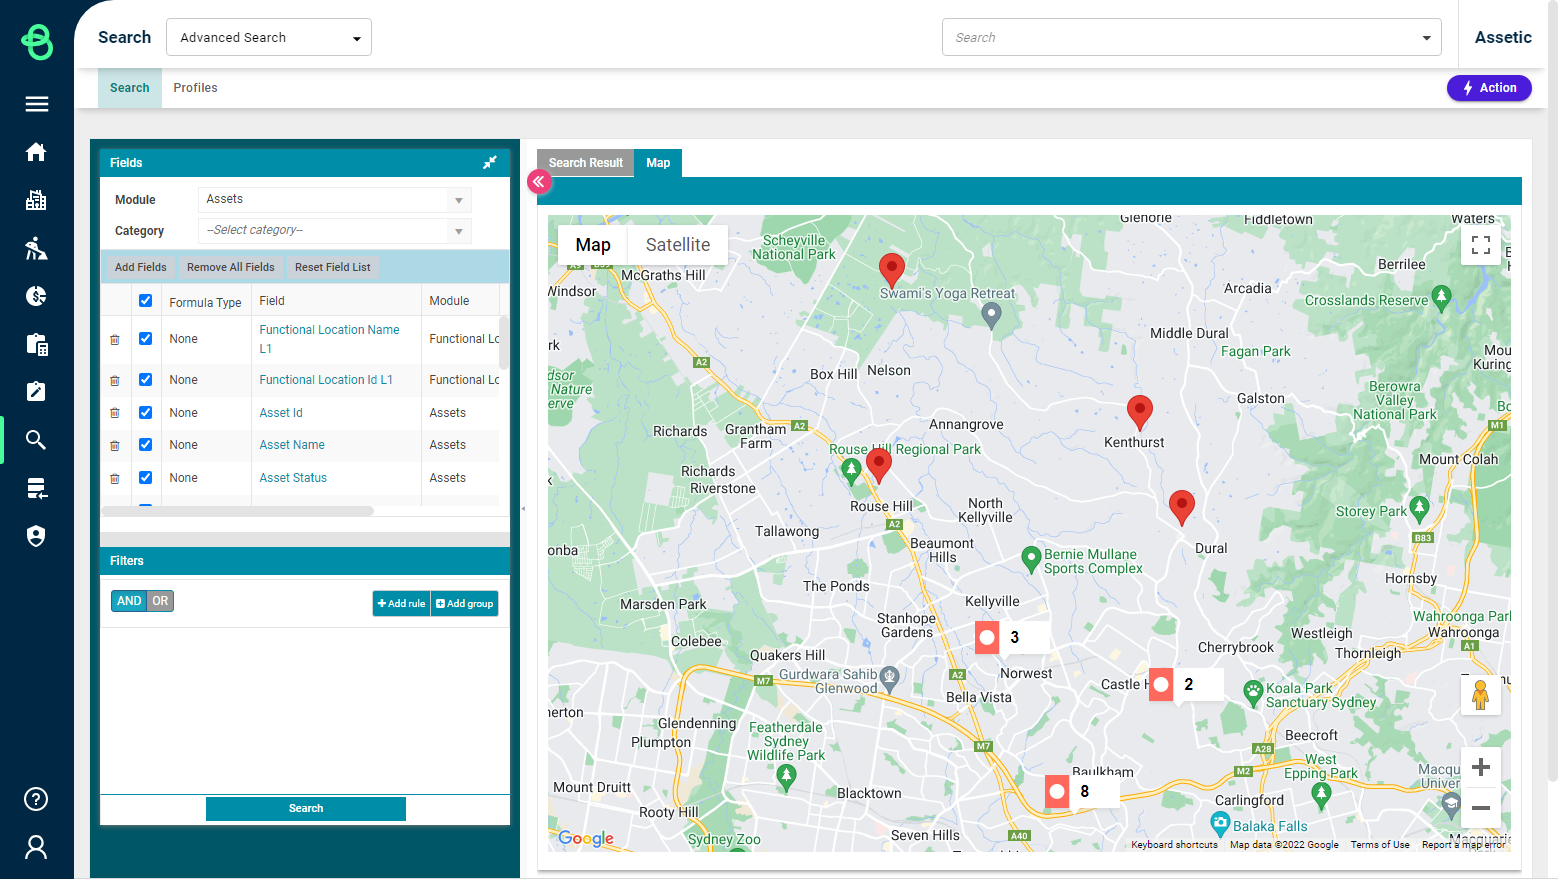
Aggregate Level Maps
As set out in the Advanced Search documentation, it is possible to create aggregate maps of Asset data from search results.
Upload Via Data Exchange Import Wizard
The Data Exchange Wizard is used to bulk import spatial data.
Since there are a large number of spatial data formats and co-ordinate systems in use, the spatial data must be prepared in a particular format and co-ordinate system prior to import.
The Data Exchange import process itself is no different from the process for other modules supported by Data Exchange. The "Module" is 'Mapping' and the "Category" is 'Asset Spatial'. Refer to article Data Exchange Import Wizard for more detail on how to import data.
NOTE Asset Spatial data uploaded via Data Exchange takes precedence over any manual changes and cannot be edited manually after import. Editing it again will require the same DX Import procedure.
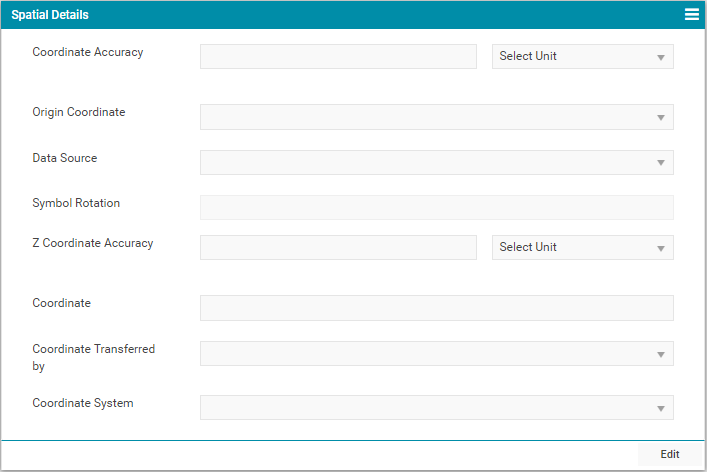
Location Attributes
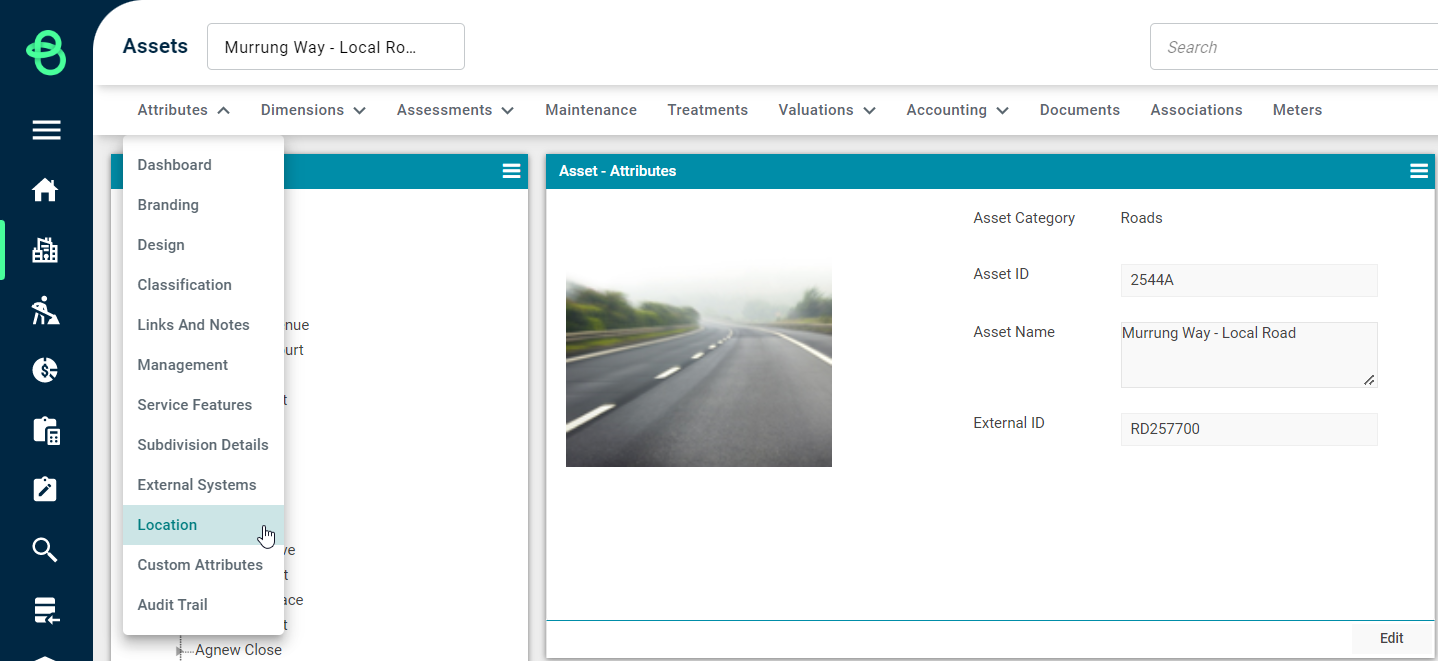
Additional Location data fields are available for each asset, and these can be updated within an asset's attributes. To update the Location Attributes, select the Location menu option found under the Attributes dropdown list when viewing a specific asset:
This will display a range of Attribute related group boxes that can be populated:
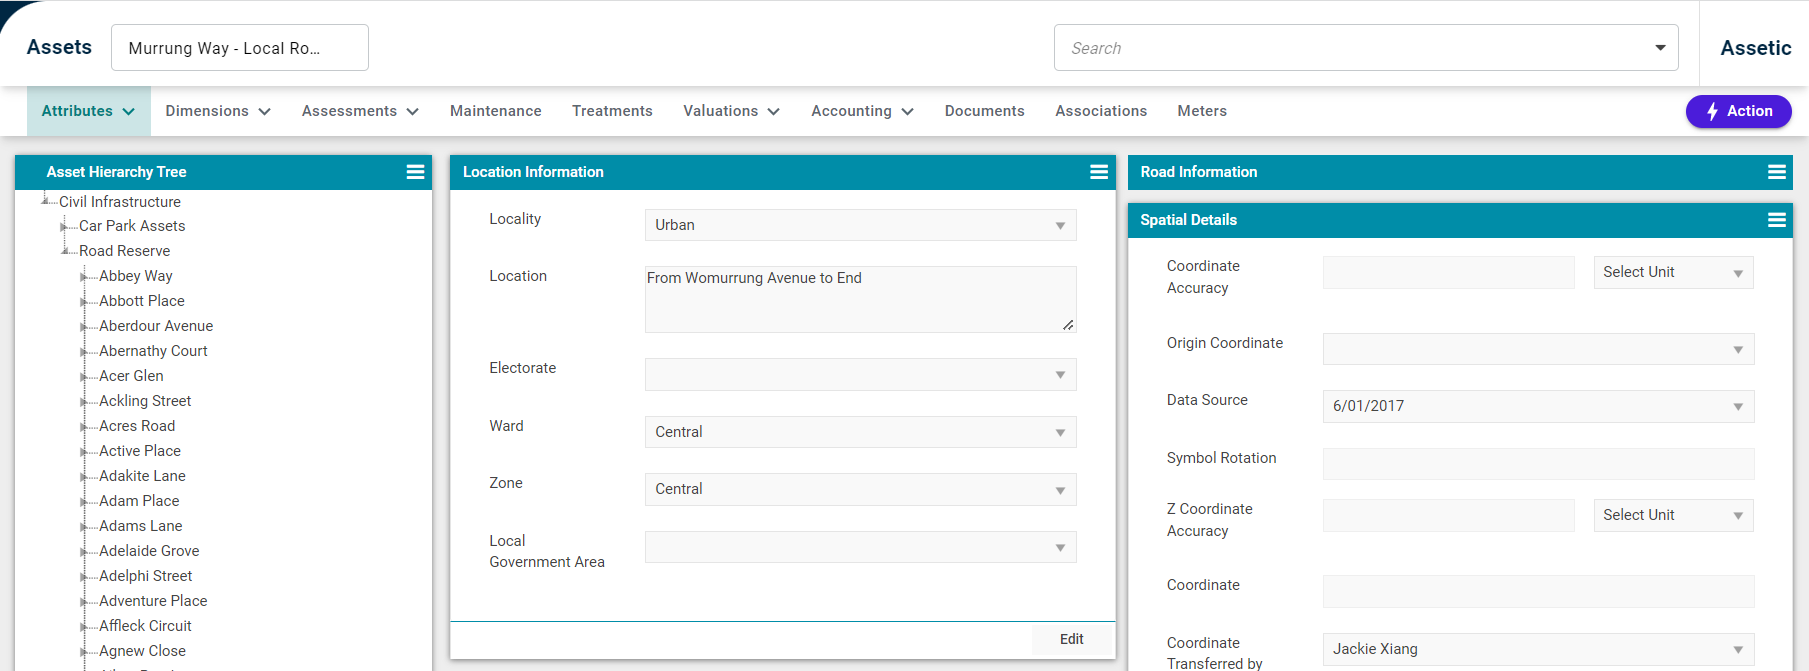
In the above example, this asset is located in the "Central" maintenance zone.
Capturing additional Location data in this way can be useful for asset reporting, mapping and management.
Also located in the Location Attributes view is a group box for Spatial Details, which can be updated in conjunction with a corporate GIS system. Additional information on how to create or update spatial data, in relation to a GIS system, can be found here.